1. 什么是 Cloudflare 验证码,为什么需要它?
Cloudflare验证码是一种防止自动请求的保护系统,可以防止网站资源被滥用。对于大多数真正的访问者来说,这种验证码不会造成任何不便,因为它不要求执行某些任务 - 验证通常在后台进行(否则,您最多需要做的就是点击带有 "确认您是人类 "字样的窗口)
当您成功通过 Cloudflare 验证码时:

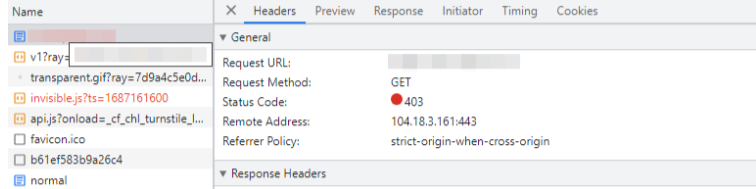
如果系统检测到自动请求的迹象,则可能会出现此消息:
Cloudflare 提供两种验证码:转门和挑战。
2. Turnstile 和 Challenge:区别是什么?
因为现在一些Challenge也会和Turnstile差不多,要想具体区分出来他们的话,我最常用的方法就是,打开控制台,搜索cvid
这样的基本就是Challenge验证码了。
当然,我在网上还找了其他两种方案,但是没有亲身试过。
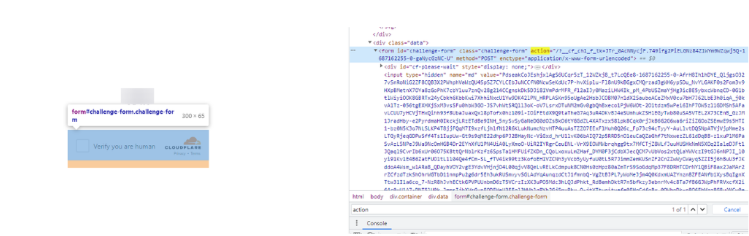
- id 为 challenge-form 的表单具有一个包含__cf_chl_f_tk=参数的 action 属性(不要误认为是转门验证码参数中的 action):
3. 在node上使用playwright实现解决方案(只弄Challenge验证码,Challenge比较复杂)
通过page.addInitScript方法,在页面加载前注入一段脚本。此脚本使用Proxy对象重写window.turnstile的render方法。当render方法被调用时,它会提取相关参数,如sitekey、cData等,存储在window.params中,并保存回调函数window.turnstileCallback。同时,原render方法依然会被执行。
1
2
3
4
5
6
7
8
9
10
11
12
13
14
15
16
17
18
19
20
21
22
23
24
25
26
27
| await page.addInitScript(() => {
console.log('xxxxxxxxxxxxxxxxxxxxx脚本注入')
window.turnstile = new Proxy(window.turnstile || {}, {
get(target, prop) {
console.log(`proxy拦截到了:${prop}`);
if (prop === 'render') {
return function (...args) {
const [elementId, options] = args;
console.log('Turnstile Render Options:', JSON.stringify(options));
window.params = {
type: "TurnstileTaskProxyless",
websiteKey: options.sitekey,
websiteURL: window.location.href,
data: options.cData,
pagedata: options.chlPageData,
action: options.action,
userAgent: navigator.userAgent
};
window.turnstileCallback = options.callback;
return target.render?.apply(this, args);
};
}
return target[prop];
}
});
});
|
使用page.goto方法导航到指定的openUrl,并等待页面网络活动结束(waitUntil: 'networkidle')
1
| await page.goto(openUrl, { waitUntil: 'networkidle' });
|
通过page.evaluate在页面上下文中执行一段 JavaScript 代码,等待window.params被设置。如果在 5 秒内window.params存在,则返回其值;否则返回null。
1
2
3
4
5
6
7
8
9
10
| const params = await page.evaluate(() =>
new Promise((resolve) => {
console.log('xxxxxxparams======');
if (window.params) {
resolve(window.params);
} else {
setTimeout(() => resolve(null), 5000);
}
})
);
|
如果成功获取到params,则构建一个包含clientKey和task信息的data对象,通过fetch向 2Captcha 的createTask接口发送 POST 请求,创建一个验证码识别任务,并等待响应解析为 JSON 格式数据。
1
2
3
4
5
6
7
8
9
10
11
12
13
14
15
16
17
18
19
| if (params) {
const data = {
clientKey: key,
task: {
type: 'TurnstileTaskProxyless',
websiteURL: params.websiteURL,
websiteKey: params.websiteKey,
data: params.data,
action: params.action,
pagedata: params.pagedata
}
};
const createResult = await fetch('https://api.2captcha.com/createTask', {
method: 'POST',
headers: { 'Content-Type': 'application/json' },
body: JSON.stringify(data)
});
const createTaskResult = await createResult.json();
|
若创建任务成功得到taskId,则定义一个递归函数getTaskResult来轮询 2Captcha 的getTaskResult接口,获取任务处理结果。如果任务状态为processing,则等待 5 秒后再次请求,直到获取到最终结果。
1
2
3
4
5
6
7
8
9
10
11
12
13
14
15
16
17
18
19
20
| if (createTaskResult.taskId) {
const getTaskResult = async (taskId) => {
const taskResult = await fetch('https://api.2captcha.com/getTaskResult', {
method: 'POST',
headers: { 'Content-Type': 'application/json' },
body: JSON.stringify({
clientKey: key,
taskId
})
});
const taskResponse = await taskResult.json();
if (taskResponse.status === 'processing') {
await new Promise(resolve => setTimeout(resolve, 5000));
return await getTaskResult(taskId);
}
return taskResponse;
};
const taskRes = await getTaskResult(createTaskResult.taskId);
|
当获取到任务结果且包含token时,通过page.evaluate在页面上下文中执行window.turnstileCallback回调函数,并传入token,完成验证码的破解流程。
1
2
3
4
5
6
| if (taskRes?.solution?.token) {
await page.evaluate((token) => {
console.log(window, token);
window.turnstileCallback(token);
}, taskRes?.solution?.token);
}
|
通过上述步骤,代码利用 2Captcha 的服务实现了对 Cloudflare 挑战型验证码的自动化破解,为网络爬虫和自动化工具提供了绕过此类验证码的能力。然而,在实际应用中,需要注意遵守相关法律法规和网站的使用条款,避免非法的爬虫行为。
🎭 破解cloudflare Challenge验证码